DIY Yagi Antenna: Your Ultimate Guide To Building A Powerful Signal Booster
Ever wondered how you can boost your signal reception without breaking the bank? DIY Yagi antennas are your answer, my friend. These bad boys are not just cost-effective but also surprisingly easy to build if you know what you're doing. Whether you're trying to improve your TV reception or enhance your radio signals, a homemade Yagi antenna can work wonders for your setup.
Now, before we dive into the nitty-gritty, let’s get one thing straight—building your own Yagi antenna is not rocket science. Sure, it requires a bit of patience and some basic tools, but trust me, it’s totally doable for anyone with a little DIY spirit. Plus, the sense of accomplishment you’ll feel once you’ve got it up and running? Priceless.
Before we jump into the steps and tricks, it’s important to understand what exactly a Yagi antenna is and why it’s such a game-changer. So, buckle up, because we’re about to take you on a journey through the world of signal boosting, one step at a time. Let’s make sure you’re equipped with all the knowledge you need to build the perfect DIY Yagi antenna for your needs.
Read also:Valvoline Coupon 25 Synthetic Oil Change Price The Ultimate Guide For Your Car
Here’s a quick table of contents to help you navigate through this epic guide:
- What is a Yagi Antenna?
- Why Choose DIY Yagi Antenna?
- Tools and Materials You'll Need
- Design and Planning
- Step-by-Step Guide to Building a Yagi Antenna
- Optimizing Performance
- Common Mistakes to Avoid
- Tips for Beginners
- Applications of DIY Yagi Antennas
- Conclusion and Next Steps
What is a Yagi Antenna?
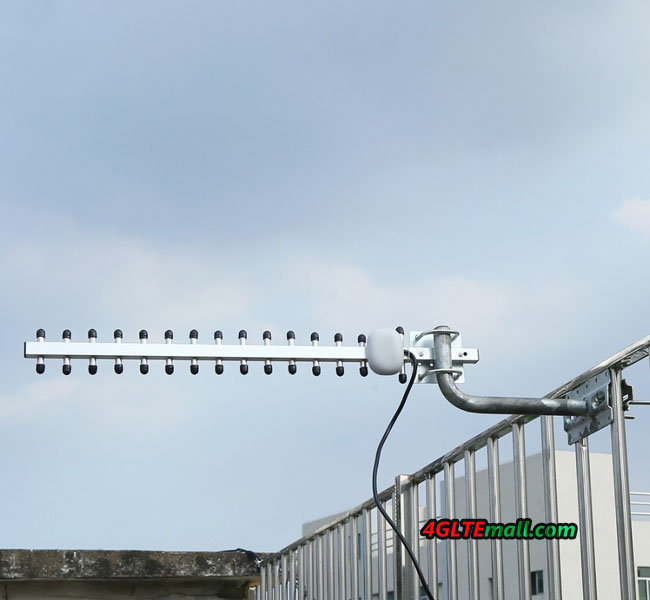
Alright, let’s start with the basics. A Yagi antenna, also known as a Yagi-Uda antenna, is a directional antenna that’s super efficient at receiving signals from a specific direction. Think of it like a laser beam for radio waves—it focuses on capturing signals from one particular source while ignoring all the noise around it.
What makes the Yagi antenna so special? Well, its design consists of a driven element, reflector, and several directors. These components work together to boost signal strength and directivity. And the best part? You can build one yourself without spending a fortune on fancy equipment.
Why is it called Yagi Antenna?
The name comes from its Japanese inventors, Hidetsugu Yagi and Shintaro Uda. While Yagi got most of the credit back in the day, both guys played a key role in developing this amazing piece of tech. Fun fact: The original design was created way back in the 1920s, and it’s still widely used today. Talk about timeless innovation!
Why Choose DIY Yagi Antenna?
Building your own Yagi antenna might sound intimidating at first, but hear me out. There are tons of reasons why going the DIY route is a great idea. First off, it’s super affordable compared to buying a pre-made antenna. Second, it’s a fun project that teaches you a ton about how antennas work. And third? You get to customize it to fit your exact needs.
Plus, there’s something incredibly satisfying about creating something with your own two hands. Imagine sitting back and enjoying crystal-clear reception, knowing that you built the antenna yourself. Now that’s what I call a win-win situation.
Read also:Best Remoteiot Vpc Network Raspberry Pi Setup For Your Smart Home
Tools and Materials You'll Need
Before you start building, you’ll need to gather a few essential tools and materials. Don’t worry, nothing too fancy here. Most of these items are probably already lying around your house or garage. Let’s break it down:
Materials:
- Copper or aluminum wire (for the elements)
- PVC pipe or wooden dowel (for the boom)
- Coaxial cable (to connect the antenna to your device)
- Soldering iron and solder (for connecting wires)
- Insulating tape or heat shrink tubing
Tools:
- Measuring tape
- Hacksaw or jigsaw (for cutting the boom)
- Pliers (for bending and shaping the wire)
- Drill (optional, for securing the elements)
Got all that? Good. Now let’s move on to the next step.
Design and Planning
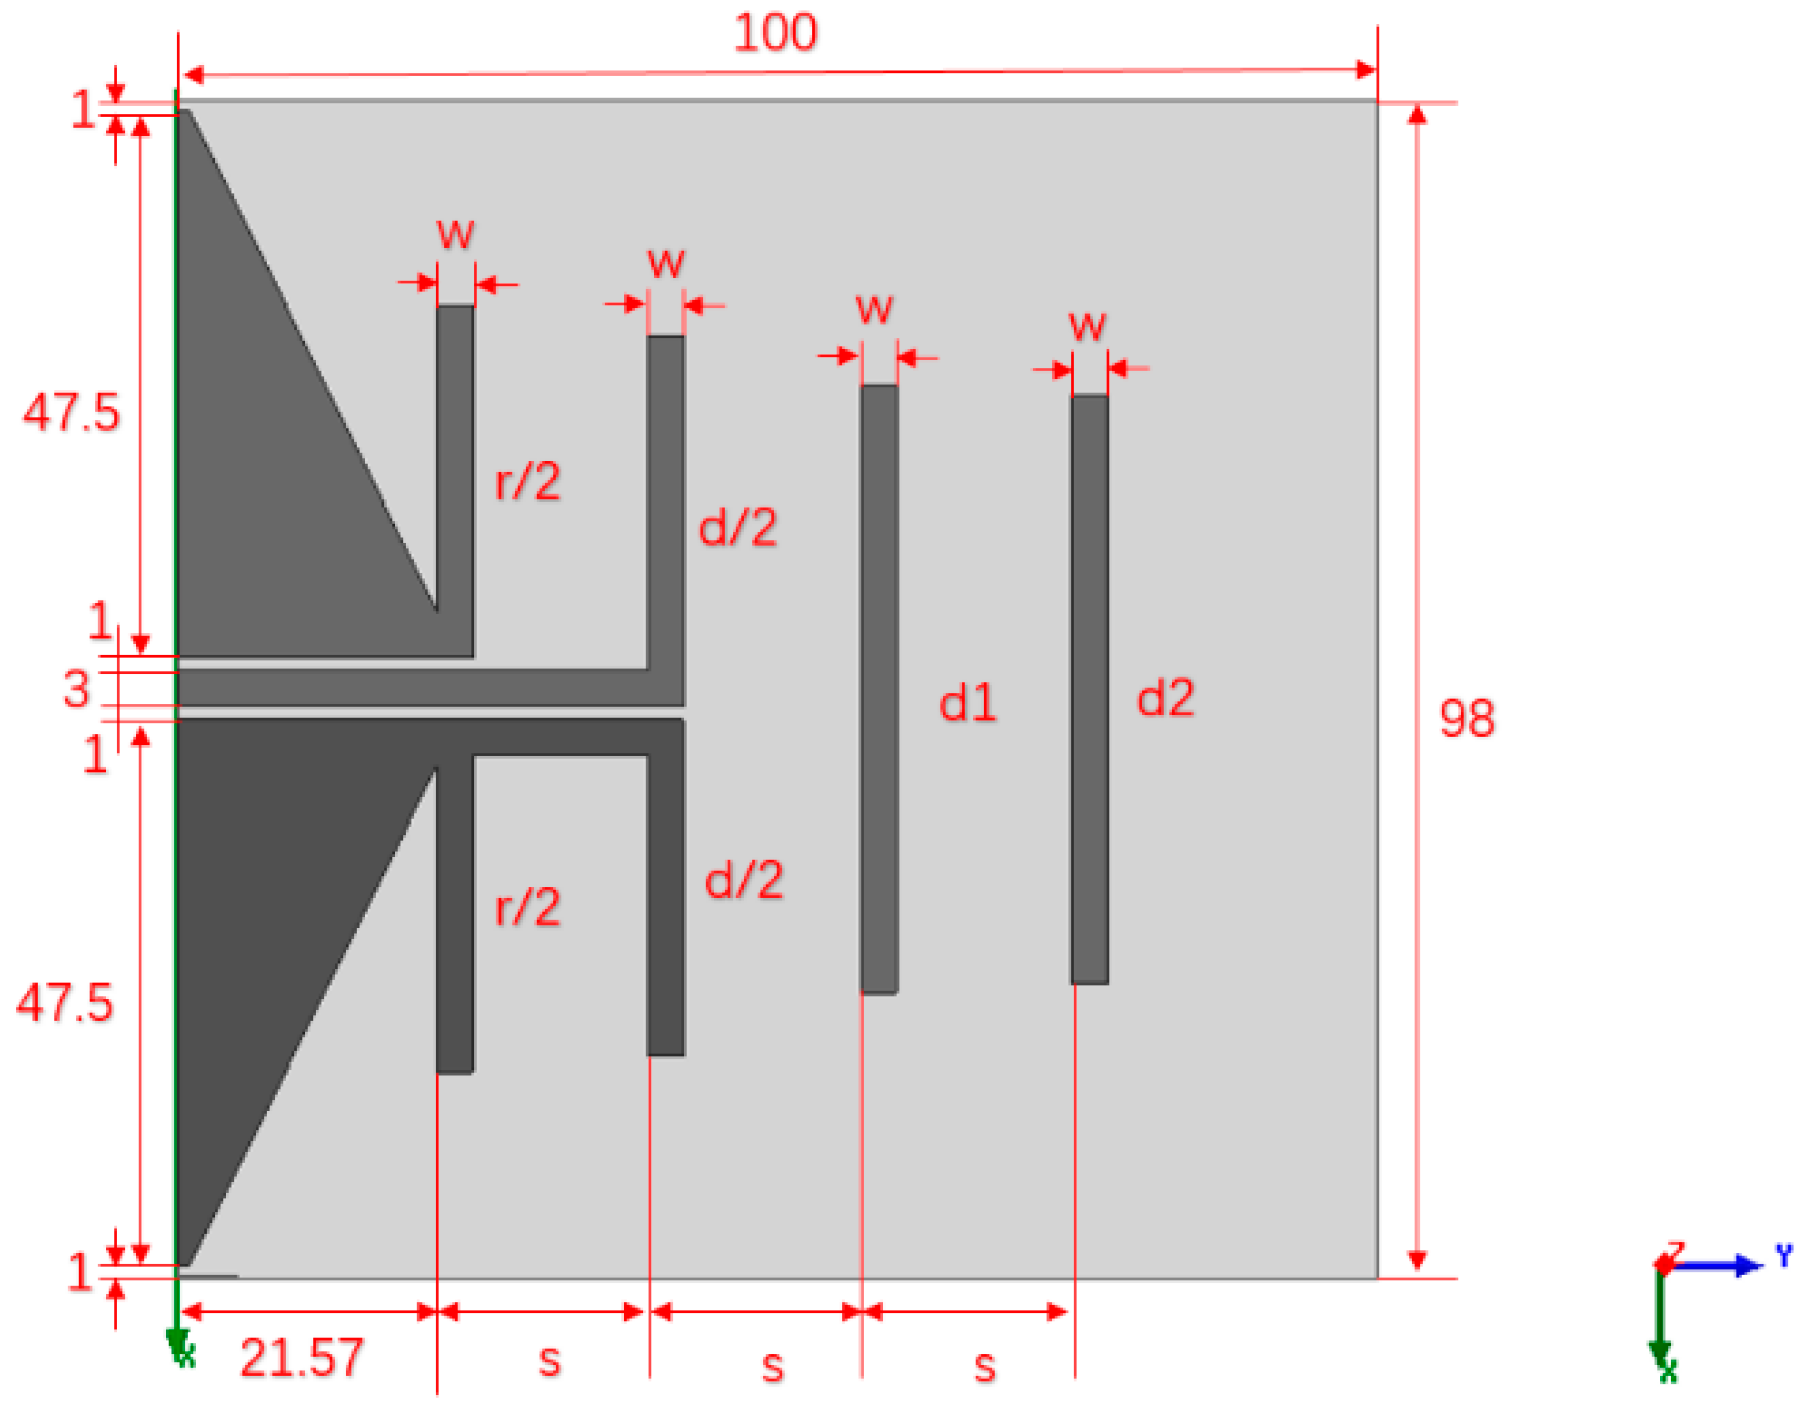
Designing your Yagi antenna might sound complicated, but it’s actually pretty straightforward if you follow a few simple rules. The key is to determine the right dimensions for your antenna based on the frequency you want to receive. Here’s how you can do it:
Start by calculating the length of each element using the formula:
Element Length = 300 / Frequency (MHz)
For example, if you’re aiming for a frequency of 450 MHz:
Element Length = 300 / 450 = 0.66 meters (or 66 cm)
Once you’ve figured out the lengths, sketch out a rough design of your antenna. Decide how many directors you want to include (more directors mean better performance, but also more complexity). And don’t forget to plan where you’ll mount the antenna once it’s ready.
Planning Tips:
- Make sure your boom is sturdy enough to support all the elements.
- Leave enough space between the elements to avoid interference.
- Consider the weather conditions in your area when choosing materials.
Step-by-Step Guide to Building a Yagi Antenna
Alright, let’s get to the fun part—building your DIY Yagi antenna. Follow these steps carefully, and you’ll have a fully functional antenna in no time.
Step 1: Cut the Boom
Using your hacksaw or jigsaw, cut the PVC pipe or wooden dowel to the desired length. This will serve as the backbone of your antenna.
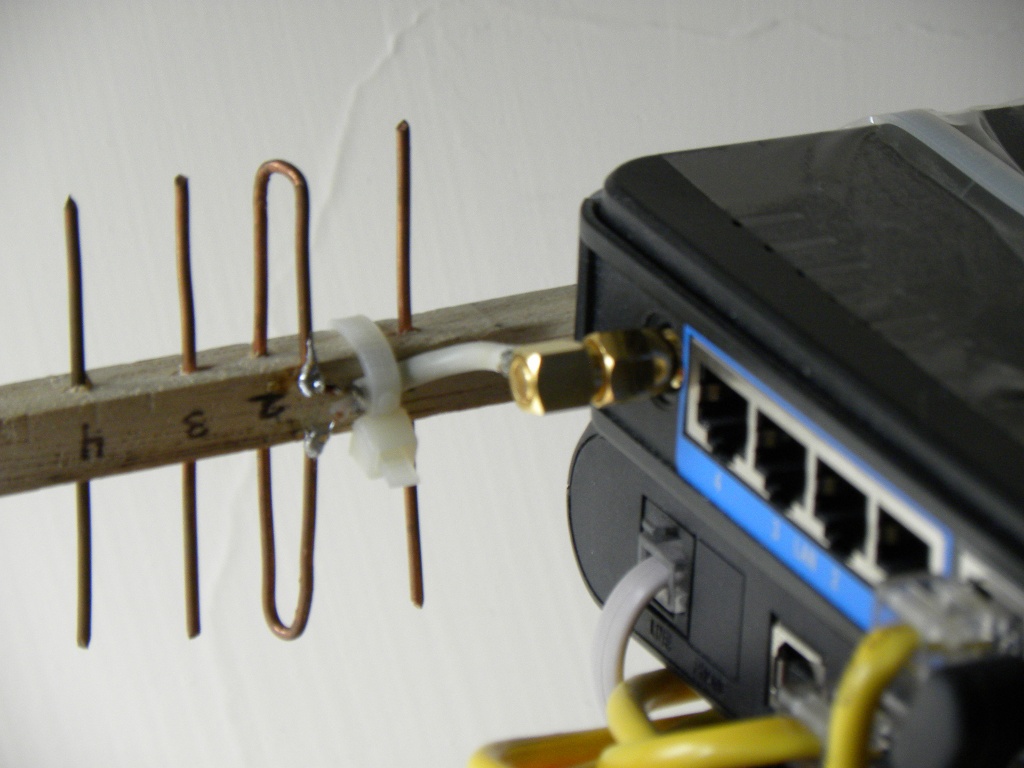
Step 2: Create the Elements
Bend the copper or aluminum wire into the required lengths for the driven element, reflector, and directors. Use pliers to shape them into straight, parallel rods.
Step 3: Attach the Elements
Secure the elements to the boom using screws or adhesive. Make sure they’re evenly spaced and aligned properly. Double-check your measurements to ensure accuracy.
Step 4: Connect the Coaxial Cable
Solder the coaxial cable to the driven element, making sure the connections are secure and insulated. This will be the wire that connects your antenna to your device.
Step 5: Test and Adjust
Mount your antenna in a clear, unobstructed area and test its performance. If the signal isn’t as strong as you’d like, tweak the element lengths or spacing until you achieve optimal results.
Optimizing Performance
Now that your antenna is up and running, let’s talk about how you can make it even better. Here are a few tips to help you get the most out of your DIY Yagi antenna:
- Position the antenna as high as possible to reduce interference from obstacles.
- Orient the antenna towards the signal source for maximum reception.
- Use a signal meter to fine-tune the alignment and achieve peak performance.
And don’t forget to regularly check and maintain your antenna to ensure it stays in top shape. A little maintenance goes a long way in keeping your signals strong and clear.
Common Mistakes to Avoid
Building a Yagi antenna might seem simple, but there are a few common mistakes that can trip you up if you’re not careful. Here’s what to watch out for:
- Incorrect element lengths can lead to poor performance. Always double-check your measurements.
- Improper connections can cause signal loss. Make sure all your solder joints are secure and insulated.
- Mounting the antenna too low or near obstacles can interfere with signal reception. Choose a clear, open location.
By avoiding these pitfalls, you’ll be well on your way to building a successful DIY Yagi antenna.
Tips for Beginners
If this is your first time building a Yagi antenna, don’t worry—I’ve got you covered. Here are a few beginner-friendly tips to help you get started:
- Start with a simple design and gradually add complexity as you gain experience.
- Use online calculators to help with the math. They’re a lifesaver when it comes to determining element lengths.
- Join online forums or communities to connect with other DIY enthusiasts. You’ll learn a ton from their experiences and advice.
Remember, practice makes perfect. The more you experiment and tweak your design, the better your results will be.
Applications of DIY Yagi Antennas
So, what can you use your DIY Yagi antenna for? The possibilities are endless. Here are just a few examples:
- Boosting TV signal reception
- Enhancing radio communication
- Improving Wi-Fi coverage in remote areas
- Tracking weather balloons or drones
No matter what your needs are, a well-built Yagi antenna can help you achieve them. And the best part? You get to say you built it yourself. How cool is that?
Conclusion and Next Steps
Building a DIY Yagi antenna might seem like a daunting task, but with the right guidance and a bit of determination, anyone can do it. From choosing the right materials to optimizing performance, we’ve covered everything you need to know to create a powerful signal booster for your home or business.
So, what are you waiting for? Grab your tools, gather your materials, and get building. And don’t forget to share your experience with us in the comments below. We’d love to hear about your successes (and maybe even your failures—they’re part of the learning process too!).
Happy building, and may your signals always be strong and clear!
Article Recommendations